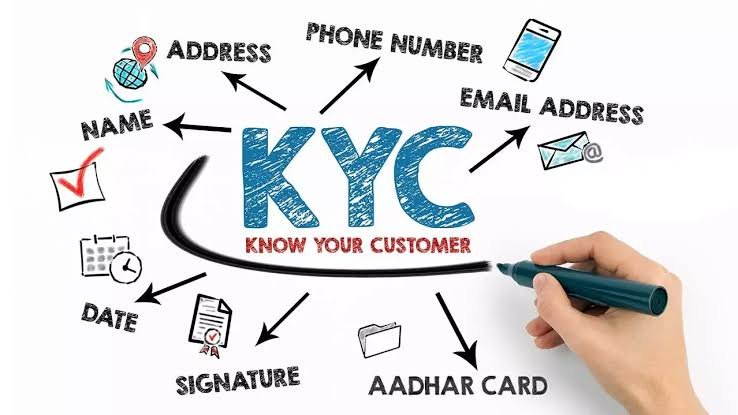




KYC, or Know Your Customer, is the backbone of every demat account opening in India, and it’s designed to be both thorough and genuinely fast when your documents are in order. Rather than a single step, KYC is really a sequence of verification checks that confirm your identity, address and financial details using official, government-linked sources. Understanding how this process actually works helps you move through it smoothly and know exactly what to expect at each stage.

What KYC Actually Means in This Context
KYC is the regulatory framework that requires every financial institution, including stockbrokers and depository participants, to verify a customer’s identity before opening an account.
- The core purpose is to confirm that you are genuinely who you say you are, using documents issued by recognized government authorities rather than relying on self-declared information.
- SEBI mandates this process for every demat account, which is why the same core KYC requirements apply uniformly across brokers, even though the exact interface and sequence can vary slightly from one platform to another.
- Once you complete KYC with one broker, your details are recorded with a central KYC Registration Agency (KRA), which means future account openings with other brokers can sometimes be faster, since parts of your verified information are already on file.
- KYC isn’t a one-time formality that disappears afterward — it also supports the account throughout its life, covering things like updates to your address or bank details down the line.
The Documents That Power the KYC Process
A small set of documents does almost all the work during KYC, and each one serves a distinct purpose.
- PAN (Permanent Account Number) anchors your entire financial identity, linking your demat account to your tax records and acting as the first checkpoint in verification.
- Aadhaar provides both identity and address confirmation, and its linkage to your mobile number is what enables the instant, paperless e-KYC process most brokers now use.
- A linked bank account, verified through a cancelled cheque, bank statement, or instant digital verification, confirms your financial identity and where funds will move during trading.
- A recent photograph, usually captured live through the broker’s app, ties your physical identity to the documents being verified.
Step One: PAN Verification Against Official Records
The moment you enter your PAN, the system checks it against the Income Tax Department’s database before letting you proceed further.
- This check confirms your PAN is valid, active, and correctly linked to the name and date of birth you’ve entered into the application.
- The system also checks for existing demat account associations, ensuring there’s no unusual duplication or conflict tied to the same PAN.
- When your details match official records cleanly, this step is typically completed within a few seconds, letting you move straight ahead.
- If there’s a mismatch between what you’ve entered and what the Income Tax Department has on file, this is resolved directly with that authority rather than through the broker.
Step Two: Aadhaar-Based e-KYC
This is the heart of the modern KYC process, replacing what used to require physical documents and in-person visits.
- An OTP is sent to the mobile number linked with your Aadhaar, and entering it correctly authorizes the release of your basic KYC details — name, address, date of birth and photograph — directly from UIDAI, the Aadhaar issuing authority.
- Because this information comes straight from a secure, government-regulated source, it’s treated as strong, authenticated proof, which is why this step allows most applications to proceed instantly without further manual checking.
- This exchange happens through an official API connection, meaning your verified details are shared securely rather than you needing to manually upload Aadhaar copies in most modern implementations.
- For this step to work, your Aadhaar needs to be actively linked to a mobile number you currently have access to, since the OTP is the mechanism that confirms you’re the genuine account holder.
Step Three: In-Person Verification (IPV)
Regulators require a live confirmation that a real person, matching the verified documents, is genuinely completing the application.
- You’ll typically be asked to record a brief video or take a live selfie, often while holding your PAN card, sometimes reading a short code shown on screen at that moment.
- This step exists to prevent identity misuse, ensuring the person opening the account matches the identity already confirmed through Aadhaar.
- Many brokers now use automated facial-matching technology to compare this live capture against your Aadhaar photograph instantly, which keeps the overall process quick.
- Good lighting and a clear camera view help this step go smoothly on the first attempt, since the system is specifically looking for a clean match.
Step Four: Bank Account Verification
Since every transaction eventually involves money movement, your bank details need their own layer of confirmation.
- Instant verification through net banking or UPI lets the system confirm your account in real time, checking that it’s active and that the registered name matches your other KYC details.
- Alternatively, a cancelled cheque or recent bank statement works for verification, though this route typically takes a little longer since it may involve a manual check.
- Some brokers use penny-drop verification, depositing a small token amount into your account and confirming both receipt and the account holder’s name as returned by your bank.
- This step works best when the name on your bank account matches your PAN and Aadhaar exactly, since consistency here keeps the process moving without needing additional confirmation.
Step Five: Final Consolidation and Digital Signing
The last stage brings everything together into one completed application.
- The system runs a consolidated check across all the information gathered — PAN, Aadhaar, bank details, photograph — confirming everything aligns as a complete, coherent application.
- You’ll complete an electronic signature, often through an Aadhaar-based e-sign process, finalizing your account opening agreement.
- Nominee details are recorded as part of this step, and most platforms ask you to either name a nominee or formally confirm you’re choosing not to, before the application can proceed to approval.
- When everything checks out cleanly, this final stage is usually automated and quick, letting your account move to approval without further delay.
How Your KYC Status Supports You Going Forward
Once completed, your KYC record continues to play a role well beyond the initial account opening.
- Your verified details are held with a KYC Registration Agency, a central system that other SEBI-registered intermediaries can reference, which can make opening additional accounts in the future noticeably quicker.
- If you ever need to update your address, mobile number or bank details, this happens through a similar verification process, keeping your records accurate and current.
- Your KYC status also supports things like mutual fund investments and other regulated financial services, since many of these rely on the same underlying verification standards.
- Keeping your mobile number and email updated with your KYC records ensures you continue receiving important account notifications and can complete future verifications smoothly whenever they’re needed.
Making the KYC Process Work Smoothly for You
A little preparation goes a long way toward a quick, comfortable experience.
- Use details that match exactly across your PAN, Aadhaar and bank account, since this consistency is what allows each verification step to move quickly.
- Keep your Aadhaar-linked mobile number active and with you, since several steps depend on receiving an OTP in real time.
- Choose a well-lit, quiet space for the live video or selfie step, giving the system the clearest possible view for an accurate match.
- Opt for instant digital bank verification where it’s offered, since this tends to be faster and smoother than uploading a physical document.
- Decide your nominee details ahead of time, so the final stage of the process completes without needing to pause and gather this information.
Frequently Asked Questions
Q1. Do I need to repeat the full KYC process every time I open a demat account with a different broker?
Not entirely — since your KYC details are recorded with a central KYC Registration Agency, much of your verified information can be referenced by other SEBI-registered brokers, which often makes opening a subsequent account faster than your very first one.
Q2. What happens to my Aadhaar information once I’ve completed e-KYC with a broker?
Your verified details are shared securely through an official government API, and most brokers receive only the confirmed KYC information released by UIDAI rather than storing your raw Aadhaar number directly, keeping the exchange secure throughout.
Q3. Can I complete KYC if my Aadhaar isn’t linked to my current mobile number?
The OTP-based e-KYC step specifically needs an active, linked mobile number to work, so if yours has changed, updating it with UIDAI first is the necessary step before you can complete this part of the process online.
Q4. Is there a way to speed up the in-person verification step if it keeps needing a retry?
Trying the step again in a well-lit room with a stable internet connection and holding your documents steady for the camera usually resolves most retries, since this step is simply looking for a clear, accurate match between you and your verified photograph.